Kit Instructions

Play Video
Play Video

Step-By-Step Instructions

Using the blood sample collection is easy, and should only take you about 15 minutes. Be sure to read all the instructions thoroughly before starting.

Please carefully follow these sample collection and return guidelines


Return your blood sample within 24 hours after collection

Before collecting your blood sample, please be sure to have a plan in place to have your sample picked up by FedEx, or dropped off at a FedEx location, within 24 hours. This is critical to preserve the quality of the sample. A prepaid shipping label will already be on the outside of the box (that the kit arrived in). If you complete the self-collection process on-site at 3 Kings, they will promptly ship the kit to the lab for you. To schedule a pick-up with FedEx, scan the QR code on the TrueLevel kit insert, then just follow the step-by-step instructions provided.


Only return your sample Monday, Tuesday, Wednesday, or Thursday

To ensure your sample arrives at the lab during operating hours, please ship your samples Monday through Thursday only. This helps make sure it gets to the lab during operating hours. You should not ship your sample on a Friday, Saturday, or Sunday.

Step 1

Before You Begin

Before you begin, you’ll need a few additional supplies.

  • Timer
  • Pen
  • Razor (to remove any hair from the blood collection site)
  • Small mirror (to help see the collection in progress)
Step 2

Prepare to Collect Your Sample

We ask that you return your blood sample within 24 hours of collecting it. So before you begin, please be sure to have a plan in place to have your sample picked up by FedEx, or dropped off at a FedEx location, within 24 hours.

  1. Find a good place to open the kit and lay out its contents along with your timer, pen, razor, and small mirror.
  2. Wash your hands.
  3. Choose a collection site on one of your shoulders. For best results, use the razor to remove any hair.
  4. Remove the Tasso+ Device and test tube from the tray.
  5. Twist and remove the cap from the test tube.
  6. With the fill lines on the tube facing out, and the label facing back, press the tube into the Tasso+ device until it's snug.
  7. Follow the instructions on the warmer pack to activate it. If it doesn’t heat up, don’t worry. Just discard the warmer pack and use your hand instead.
  8. Rub the heat pack or your hand up and down the collection site for 2 minutes to increase the blood flow.
  9. Clean the collection site with the alcohol pad and allow it to dry.

Step 3

Collect Your Blood Sample

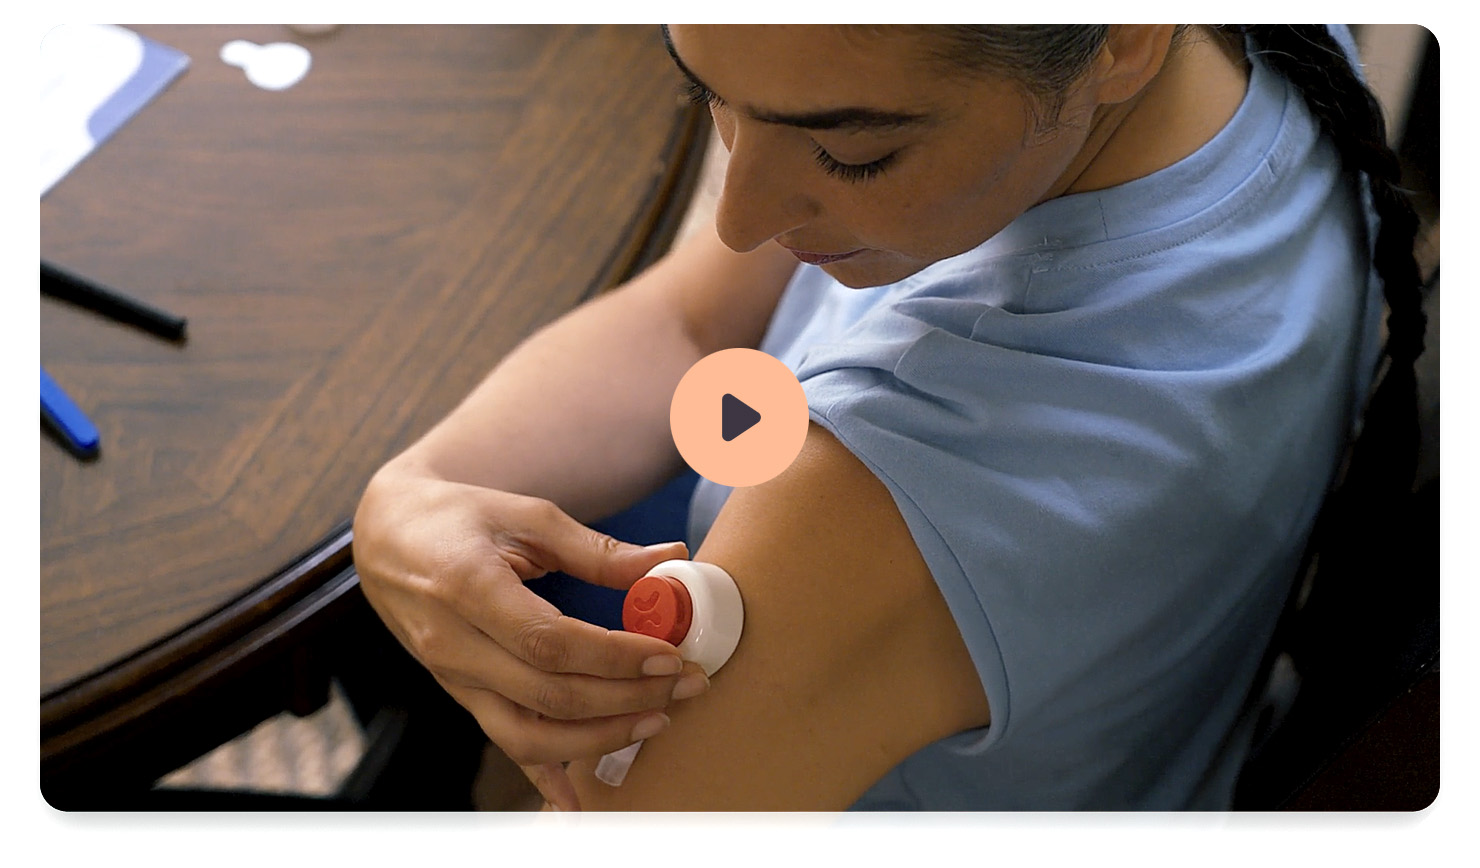
The blood collection process is usually painless. In fact, you may not feel anything at all.

  1. Remove the clear plastic cover over the red button on the device.
  2. Peel the adhesive tab away from the back of the device
  3. Stick the device to the collection site on your arm.
  4. Hang your arm straight down your side, then press the red button all the way down one time and release it. Set a timer for 5 minutes.
  5. Watch the tube fill using the mirror as needed. Blood may not appear for the first 1 to 2 minutes.
  6. Remove the device after 5 minutes, or sooner if blood reaches the top fill line before 5 minutes.
  7. Remove the device by gently peeling it from one side. If needed, apply the latex-free bandage.
  8. Remove the tube from the collection device by twisting it slightly while pulling down.
  9. Snap the cap fully onto the tub to close it.
  10. Gently invert the tube 10 times to mix the blood. Tap or flick the tube to get the blood moving. Any gel in the tub will not mix with the blood.
Step 4

Prepare Your Blood Sample for Shipment to the Lab

Please read instructions carefully.

  1. Secure the lavender cap. Double-check that the lavender cap on the blood specimen tube is tightly closed.
  2. Label kit contents before shipping.
    • On the blood specimen tube
      • Confirm the pre-printed label includes a unique identifier and your correct date of birth
      • If the information is missing or incorrect, use the labels in the kit and neatly write in the correct information
    • On the specimen bag
      • Write the date and time that you collected your blood sample.
  3. Bag the specimen.
    • Put the blood specimen tube in the plastic biohazard bag provided.
    • Do not use the larger bag marked for trash.
  4. Check the label on the shipping box.
    • A prepaid shipping label will already be on the outside of the box (that the kit arrived in). Remember to make a note of your tracking number located on the tracking label (TRK#).
  5. Place the bagged specimen inside the box and seal the box.
    • Remove the backing from the double-sided tape, located on the inside center fold, to close and secure the box.
  6. Ship within 24 hours
    • Your sample must be shipped within 24 hours of collection to preserve the quality of the blood sample
    • Ship on Monday, Tuesday, Wednesday or Thursday. This helps make sure it gets to the lab during operating hours.
Step 5

Option 1: Schedule a Pick-up with FedEx

Here’s a very simple, step-by-step guide. Read each step slowly and follow along.

  1. Schedule your pick up within 24 hours of collecting your blood sample.
  2. Call1-800-463-3339.
  3. When FedEx asks, “Tell me what I can help you with today?” say: “I want to schedule a ground pick‑up.”
  4. When asked if the package weighs over 150 lb, say: “No.”
  5. When asked for FedEx Account information (or say I’m using a label or stamp), say: “I’m using a label or stamp."
  6. When asked if the label has the word stamp on it, say: "No."
  7. You’ll then be asked to enter your tracking number exactly as printed on the shipping label on box: 1XXX-1XXX-1XXXX
  8. When they repeat your number, for confirmation that it is correct, say “Yes, that is correct.”
  9. When they read your pick‑up address, if it is correct, say “Yes, that is correct.”
  10. When they read your phone number, if it is correct, say “Yes, that is correct.
  11. When they ask how many packages, say “One package.”
  12. They will offer pick‑up times. Choose the time that works best for you on a Monday, Tuesday, Wednesday, or Thursday ONLY.
  13. Write down your confirmation number when they give it to you.

You’re done! FedEx will pick up your sample at the time you choose.

Option 2: Drop Your Kit Off at a FedEx Affiliated Location

  1. Drop off your kit within 24 hours of collecting your sample on a Monday, Tuesday, Wednesday, or Thursday ONLY.
    • Try to drop your kit off early in the day to make sure it ships the same day and your sample stays valid.
  2. Scan the QR Code on the white card included in the kit to identify a FedEx affiliated drop-off location near you. You can also follow this link to find a FedEx drop-off location:
    • Follow FedEx instructions.
    • Enter your address or ZIP code to see nearby options.
  3. Before heading to a FedEx drop-off location, double-check that you’ve followed all the steps to prepare and seal your kit correctly. Remember to make a note of your tracking number located on the tracking label (TRK#).
  4. Drop off your sealed box at the location that’s most convenient, as early as possible — Monday through Thursday only.
    • IMPORTANT: The lab is closed on weekends, so do not collect or drop off your sample between Friday and Sunday.
  5. After drop-off, watch for a confirmation email and/or text message that your package was shipped.

Option 3: Drop Your Kit at 3 Kings for Shipment

Drop off your kit within 24 hours of collecting your sample on a Monday, Tuesday, Wednesday, or Thursday ONLY.

  1. Drop off within 24 hours.
    • Plan to bring your sealed kit to 3 Kings no later than 24 hours after you collect your blood sample. Their address is:
      • 1294 Schley Street
        Orangeburg, SC 29115
    • Remember to make a note of your tracking number located on the tracking label (TRK#).
  2. Check office hours
    • Call ahead or visit their website to confirm when they’re open.
    • Aim to arrive early in the day.
  3. Choose the right day
    • Only drop off on Monday, Tuesday, Wednesday, or Thursday. This helps make sure the blood sample is viable when received by the lab.
  4. Hand your ‘ready to ship’ box to a staff member
    • Always speak with a staff member.
    • DO NOT leave your box without making direct contact with a staff member.
  5. Track your package
    • Watch for a confirmation email and/or text once your package has been shipped.

Have Questions?

If you are unsure of your HIV status or have other questions, your local TrueLevel Community Organization can help. Contact 3 Kings at 704-900-0714. Your local health department will also have resources.